I took on a task for my daughter, and what fun I had designing "Tees" for my grandsons. They live overseas and are Home Schooled. When Gina go's shopping she gets looks from others, "Why are your boys not in school" kinda looks. So we thought "if they had tees telling the story" others might understand "they don't go to public school".
I bought three tees in their sizes, with an added size for growth.
I first cut cardboard to fit into each shirt, then using masking tape to give me a line to follow for the lettering.
At first I thought of 'free hand' painting the words, then thought better of that, I'm not that good with straight lines so I used the tape. I then found these really nice 'sponge letters' at Walmart and for the entire alphabet the price was only $2.98 and for someone who has trouble with lettering this was ideal.
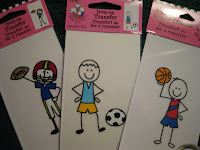
 I used yellow fabric paint in a dish and dabbed the paint on the sponges then onto the tees. For the lettering "Home" I braved my skills and used "Metallic" fabric paint with a tip. The first try was a bit jittery but I managed to complete all three shirts with a "not too bad" look. I did let the tees 'dry' for the night before putting on the little 'iron on' sports guy.
I'm happy to say "The tees turned out so cute"

Now being the fun loving Mom that I am, I had to add one last thing...I found whistles made like the sports balls the boys love so much... Gina may not like the noise but I think after years of my kids noise and always telling them to shush... now it's her turn.... sorry I have to laugh at this.. I call it "pay back".... the boys will love the whistles.....
I can't wait to see the photos of the boys in their Tees.
I'm linking to this great party


